close

LIFE AT HOME

Entertaining

How to Open a Wine Bottle Without a Corkscrew

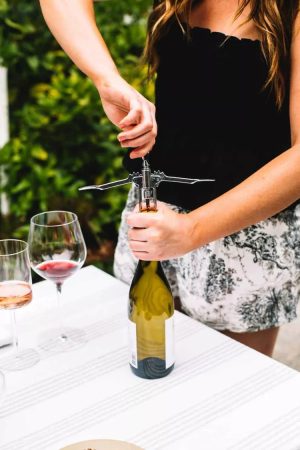
Your corkscrew may have suffered a terrible fate due to the vicious blades in your garbage disposal. You may have bought a cheap, poorly-made corkscrew that snapped in half at an inconvenient time. The broken pieces then lodged in the cork between you and the wine. You may have lost your corkscrew.

Do not worry if you do not have a backup corkscrew on hand in case of an emergency. You can remove the cork from a wine bottle even without a corkscrew. It may require some creativity, some finagling and a lot of faith.

You can use these strategies to your advantage.

Use a Sturdy Wooden Spoon

Consider pushing the cork into the bottle instead of popping it out.

  1. Place your wine bottle on a flat, stable surface.
  2. Grab a wooden spoon that has a thin handle. Place the tip of this handle on the cork.
  3. You can use your weight to press down. This will require a lot of pressure, so you may need to try several times before it starts to move.
  4. Decant the wine once the cork is out of the bottle.

Get Your Toolbox Out

Here’s how to open a bottle of wine using other household tools.

  1. Use the longest screw in your toolkit to bore through the center of the cork. Leave about 1/2 inch of screw protruding from the top.
  2. Grab the neck of the glass bottle and tuck the body under your arm.
  3. Then, using a steady, firm motion, pry the cork out with the claw end of the hammer.
  4. Pour the wine through a fine mesh strainer before drinking to ensure there are no broken pieces of cork.

Wiggle it Out

You can use force to drive the cork from your wine bottle if you don’t own any tools. But be careful, too much force could cause the bottle to shatter. So take some deep breaths and find the sweet spot between being forceful and gentle.

To protect the glass, you’ll need to cover the bottom of your bottle with some kind of padding. You can use a thick kitchen towel folded in half, or even a sneaker. You may want to put the bottle in a clean sock before using your shoe if you plan to use it.

  1. Hold your bottle at 90 degrees to the wall and tap it firmly against the wall with a rhythmic, steady beat until you see the cork begin to move out of the neck.
  2. Tap the bottle on the wall with smaller and faster movements until the cork has come out about half way.
  3. You can try to yank out the remaining cork with your fingers, while twisting it as you do so.
  4. If not, a few more thwacks on the wall will do.


Organizing

Organise your wrapping paper with these 10 genius storage ideas

We’ve rounded up 10 clever wrapping paper storage ideas that will keep you organized. We’ve come up with 10 clever wrapping paper storage solutions that will keep you organized.

You’ll be surprised to learn that only a handful of these solutions were specifically designed for wrapping paper. You probably already have some items around your house that you can use to organize your paper stash.

Find out how to organize your tubes in a creative and innovative way, from gift wrapping stations to home-based wrapping paper libraries. You may even become the crafty who turns gift-giving into an art form once you have your supplies organized.


01 of 10

Create a Gift Wrapping Station Behind the Door

To save time and to be organized, you should store your ribbons, bows and tapes with the gift wrapping paper. The perfect way to organize all your gift wrap is with this convenient station made from wooden 2x4s.

It’s thin enough to be hidden behind a closed door. You can add hooks to the side of the cabinet for additional storage.


02 of 10

Stop them from rolling off your shelves

In theory, stacking wrapping paper on a shelf is a good idea, but it’s actually not the best solution. You know that they will fall and roll.

If you’re wondering about the craft cabinet’s neat and orderly stack, a clear acrylic bookend is used as a shelf. It keeps everything in place, and it doesn’t block your view of the prey paper pattern collection.


03 of 10

Purchase a Gift Wrapping Caddy to Give Gifts On The Go

Consider a caddy from the store if you want to purchase a readymade solution for your ever-growing collection of wrapping paper. This caddy keeps your rolls, bows, labels, and greeting cards neatly organized.

This bag can be easily carried to and from if ever you need to transport your collection. You’ll be asked to wrap gifts by your friends if you’re good at it.


04 of 10

You can hang them on a pegboard that you have customized

A pegboard is all you need to organize your gift-wrapping collection. The pegboard is a great idea, because it’s simple to install and doesn’t take much space. It’s also very customizable. You can hang one on the inside of your closet door so that it is out of sight, but still accessible. You can paint it to match the decor of your home office or craft room.


5 of 10

Hang Your Wrapping Paper Rolls On Tension Rods

Make room for tension rods if you are setting up a corner of craft supplies to help you wrap an amazing gift. You can stack them on top of each other to keep all the tension rods ready and available.

You can easily roll out as much as you need, without having to remove the rods. Just pull the rod to the desired length, then use a pair of sharp scissors to cut.


06 of 10

Create a Wrapping Paper Library

You can transform any wall into a library of wrapping papers by using wooden dividers between tension rods. It’s a great place to store wrapping paper for all occasions, including Valentine’s Day, Christmas and everything else. This set is perfect for gift-giving and gift-wrapping enthusiasts.


07 of 10

Strap them together

It’s not necessary to have a whole room dedicated to gift wrapping to be organized. This hall closet proves that you can keep everything you need at your fingertips without taking up a lot of space. Two straps are used to suspend these rolls of wrapping papers from a wire rack. This keeps them off the ground and grouped. Consider using Velcro straps or bungee cords to try this solution.


08 of 10

Hack a bookcase to satisfy your gift-wrapping obsession

You may already know that there are many ways to hack the IKEA Billy Bookcase. But this set-up transforms a mass-produced product into a gift giver’s ultimate wrap station.

It is best to have some carpentry knowledge, but cutting notches into the bookcase will create slots that are easy to use for hanging wrapping paper. The best part? You can slide them up and down as you need them.


09 of 10

Curtain Rods: Free up Counterspace

It’s not worth having a space if it will be cluttered with stuff. This office-slash-wrapping station makes perfect use of a gorgeous marble backsplash with the help of small curtain rods to hang four wrapping paper rolls. This keeps the rolls out of your counter, but still within reach. Are we the only ones who think that those adorable wrapping paper patterns can also be used as decor?


10 of 10

Place them in baskets

You can get organized with a basket if you have limited space or a small budget. Wire or woven options are the best way to group your rolls of wrapping papers together. Your rolls will stay straight as long as the basket is tall.

These rolling baskets are great because they’re easy to use. Simply roll it out to wrap your gift and then slide it back in when finished. Fit them under counters in office or laundry rooms for optimal organization.


Cleaning

6 Simple Steps for Cleaning Upholstered Chairs

Upholstered chairs add character and elegance to any room, but can be a real challenge to clean. You can’t simply throw them in the washing machine. It’s not difficult to keep upholstered chairs clean. Continue reading to find out how to clean upholstered chairs , what you will need, and to maintain their cleanliness longer.

How often should you clean upholstered chairs?

Cleaning upholstered chairs is best done when they are in good condition and have been used regularly. If you use your chairs daily, and they start to look worse for wear after a few weeks, clean them every season. Clean them once a year if they are rarely used to keep dust at bay and maintain their condition.

What you’ll need

What you need to clean your upholstered chair

  • Vacuum cleaner with brush or upholstery attachment
  • Warm water
  • Use a gentle dishwashing or laundry detergent
  • Washcloths that are clean
  • For stains, you can use hydrogen peroxide (3%) or white vinegar.
  • Brushes with soft bristles
  • Steam cleaner (optional).
  • Fans

Step 1: Vacuum

Vacuum your upholstered chairs as the first step. It will help remove dirt and grime from the surface and loosen any stains that are stuck on. Use the upholstery attachment to vacuum. If your vacuum does not have an upholstery attachment, you can use the brush. Sweep the vacuum with small, gentle strokes to lift and clean hair, crumbs and other debris. Work from the top to the bottom of the chair.

Step 2: Prepare Your Cleaning Solution

Then, get the rest of your cleaning products together. It’s time to start making soap. Add a teaspoon of mild dish or laundry detergent to a large, warm bowl of water. Mix both together until you get a sudsy mixture.

Step 3: Spot clean

It’s now time to remove any stubborn stains. You can spot clean with either a commercial stain treatment or by making your own using 3% hydrogen peroxide and white vinegar. Dip a clean, dry cloth in the stain remover and dab the stain gently. Let it sit for 10 mins. While the stain remover is working, you can move onto the next step.

Step 4: Clean Your Chairs

You can dip another clean cloth in the mixture of soap and water you prepared earlier. Wring out excess liquid. Use the cloth to dampen all the upholstered surfaces of the chair. Be sure to moisten the surface without soaking it in water. As needed, dip your cloth into the soapy solution to add more cleaning agent.

Cleaning a chair in sections can result in water or soap stains. If you only have to clean a small portion of the fabric, try fading the wet material out.

Step 5: Scrub, Steam

Grab your brush with a soft bristle and scrub the mixture very gently into the upholstery. Work in small circular motions, moving from the top of the piece to the bottom.

Use your steam cleaner now. Steam clean the chair using small, crisscrossed brushstrokes.

Step 6: Rinse off and dry

Dip a clean, damp cloth into warm water to finish cleaning your upholstered chair. Sweep the damp cloth over the surface of the upholstered chair, and repeat as necessary with additional clean washcloths until the upholstery is free from suds.

Let the upholstery air dry overnight or over the course the day. Place the chair in an open room, with fans aimed at the furniture. The chair will dry evenly with the cross-breeze from this room. Space is an issue? You can also dry the chair outside in a shaded area for a couple of hours.

How to keep upholstered chairs clean longer

You can keep your upholstered chairs cleaner for longer by doing two things. First, treat any stains as soon as they appear. Do not let them sit. Second, apply a stain protection treatment to your chair to protect it from dirt and spills.

Entertaining

10 Ways to Make Your Event Guests Feel at Home

As a host you want to make sure that your guests enjoy themselves and are comfortable during the entire event.This can include everything from setting up a second plate for an additional guest to preparing a dish that is special for someone with dietary restrictions. No matter how you do it, making guests feel welcome will keep your event at the top.

Here are 10 ways to make guests feel welcome at any event.

1. Discover their favorite drinks and foods

Make sure that your event is a memorable one for your guests. This includes the food you serve and the beverages. You want to ensure that your guests will enjoy the food, whether you are catering or cooking it yourself. You can ask your guests in advance what their favorite foods and drinks are. You’ll then be able create a menu everyone will love.

2. Dress code

It’s been a while since we were invited to a gathering where the dress code was not clearly stated. You can prevent this uncertainty by clearly stating your dress code when you send out invitations. You should be as specific and give examples. You want your guests, whether it’s for a cocktail or casual soirée, to feel confident in their attire. No one wants to appear over- or under-dressed.

3. You can ask your guests about their dietary restrictions

Ask your guests about their dietary requirements before they arrive. You can ensure that everyone will be able to enjoy your spread. This small gesture can make everyone feel welcome (and satisfied). You will be genuinely appreciated by your guests for the effort and thoughtfulness.

4. Keep your personal belongings in a safe place

No one wants to have their belongings thrown in a corner or to have to search through a heap of bags and coats when they are trying to leave. It’s important to create a space where guests can safely store their belongings. This could be a closet that’s unused or if you have rented a guest room. Prepare paper tags that include the names of your guests. They can be attached to the guests’ belongings so that no one takes home the wrong bag or coat.

5. Make Room for Everyone

It’s sometimes hard to know how many guests will attend your event. Being prepared for extra guests is important. Consider setting up high-top table so that people can chat and enjoy the small bites. It allows people to move from table to table without worrying about taking a seat. Plan ahead if you have the luxury of a large home. This will help you decide what arrangement is best for your event. Consider whether you’d like round tables or a long rectangular table. Also, think about how intimate you would like it to be.

6. Create Conversation Starters

There’s no reason to be worried if you invite different groups of family members and friends who may not know one another very well. You can encourage guests to meet each other by encouraging them to start conversations. Set up markers with numbers between 1 and 5 to help guests find their way around your home. You can then hand out conversation cards so that the guests don’t have to make small talk or ask questions.

7. Check-in During the Night

Check in with each group to see if there are any needs. Checking in with guests who are shy can be a great way to make them feel more comfortable. You will have the opportunity to talk to all your guests and they can make any requests.

8. Set the mood with Music

Asking your guests to choose their favorite songs will help you create an atmosphere that is truly unique. It allows your guests to be involved in the music that they are listening to and encourages them to dance if they hear their favorite song.

9. The temperature can be adjusted

Open some windows to let the air flow if the room becomes stuffy. If it’s too hot, let your guests know they can step outside for some fresh air. In the winter, you may want to prepare blankets and heaters so that guests are warm and comfortable.

10. Prepare a Guest Bedroom

If you have space, it’s a great idea to set up a Guest Room so that you can accommodate last-minute guests. Make sure you clean the room before guests arrive, stock up on fresh linens and the bathroom essentials.

Cleaning

How to Make Kitchen Cabinets Shine Like New by Cleaning Them

It’s a fact that our kitchens are often used and abused. You should regularly deep clean your kitchen. However, you might be neglecting to clean one important item that looks cleaner than it really is: your cabinets.

Cabinets are a magnet for dirt, grime and grease. It can be overwhelming to clean kitchen cabinets. Don’t worry, keep reading to learn how to accomplish this necessary and transformative task.


How often should you clean your kitchen cabinets?

Cleaning your kitchen cabinet is an important, but sometimes difficult task. The amount of time you spend cleaning your cabinets will depend on the frequency with which you cook. Consider cleaning your kitchen cabinets every two to four weeks if you cook each night. You’re not much of a cook at home? Keep them clean by cleaning them once a year.

What you’ll need

Are you ready to clean out your kitchen cabinets now? Before you start, here’s everything you need.

  • Duster
  • Washcloths that are clean
  • Spray Bottle
  • Dish soap
  • Warm water
  • Baking soda
  • Soft-bristle scrub brush
  • Toothbrush


Step 1: Empty your cabinets

You’ll first need to empty your cabinets before you can begin deep cleaning. You can still clean your cabinets while they are full, but it will be more difficult and less thorough. It’s better to empty them before you start.

Step 2: Dust

Kitchens attract dirt and dust due to their messy use. Before cleaning the cabinets, dust must be removed.

Dust your kitchen cabinets by starting at the top and working your way down. Do not forget to dust inside the cabinets.

Step 3: Making a cleaner

It’s easy to make a cabinet cleaner. Mix a few drops dish soap and warm water into a spray bottle. Spray the cleaner directly on engineered wood cabinets, or those that have a glossy finish. Spray the cleaner on a microfiber towel before applying it to unfinished cabinets or hardwood cabinets.

Step 4: Clean inside

It’s now time to get serious about cleaning. Spray the cleaner inside the cabinets, then wipe it down with a damp cloth and elbow grease to remove the grime. After the cabinets have been cleaned with the cleaner, wipe them down with a damp clean cloth. Let the interior air dry before cleaning the exterior. Work your way up and down.


Step 5: Clean Outside

Start cleaning the outside of the cabinet using the same technique as you did the interior. Start by cleaning the top of the cabinets. There is likely to be a lot of dirt there, so pay extra attention. After you have finished cleaning the top of the cabinet, move downwards.

Step 6: Remove the Grease

The stovetop can produce many delicious meals, but can also create a greasy mess in your cabinets. Make a paste with 1/4 cup baking powder and 1/2 cup water to remove grease from your cabinets. The paste can be applied to any greasy areas and left for 5 minutes. Gently scrub it off. Use a damp, clean cloth to wipe down the area that has been treated.


Step 7: Trim the Corners and Trim the Trim

Be sure to pay special attention to the corners and trim of your cabinets before you stop cleaning them. Apply cleaner to a toothbrush to reach those hard-to-reach spots and gently scrub them to remove dirt and dust.

Step 8: Restore Items to Cabinets

After your cabinets look brand new, you’ll need to clean any mess that was made while cleaning them. As a result of the dust and dirt that was likely left behind by your cabinets, you’ll need to clean your countertops and sweep up your floors.

You can start putting the contents of your cabinets back in place once they are completely dry. Be sure to check your cabinets for any spots before you put them back. You should clean off any dirt or dust that you find to avoid stains or contaminating your cabinets.

How to keep your cabinets clean longer

Treat any spills or stains as soon as possible to keep your cabinets in top condition. You won’t need to worry about long-lasting stains. Use cabinet liners to protect the inside of your cabinets from dirt and stains. If the liners are dirty, you can clean them with dish soap and warm tap water.

Cleaning

How to Make Dishwasher Dishes Cleaner by Cleaning the Filter

Do you regularly clean your dishwasher filters? No? It’s easy to forget. It’s easy to overlook the dishwasher filter, which is another part of your kitchen you need to pay attention to regularly. Cleaning your dishwasher filter can be accomplished in a short amount of time and without any special tools. Continue reading to find out how to clean your filter and how often you should do it.

How often should you clean your dishwasher filter?

Dishwasher Filters prevent food from getting back onto your dishes and keep large food wastes out of your plumbing. It is important to regularly clean your filter, as a clogged one will stop your dishwasher draining properly. If you use your dishwasher daily or every other day, then it only needs to be cleaned once per month. If you run it more than once a day, however, clean the filter weekly. If you have just finished a cycle with a dirty or soiled wash, make sure to clean the filter after it finishes.

What you’ll need

Before you begin, gather all the supplies that you’ll need. What you will need is:

  • Warm water
  • Dish soap
  • Scrubbing sponge or brush
  • Dishwasher cleaning tablets
  • White vinegar (optional).

Step 1: Remove bottom rack

It is easier to remove the bottom dish rack if you can. You can either lift or roll your bottom rack out of your dishwasher to place it elsewhere.

It’s time to clean your bottom rack of the dishwasher. Spray the bottom rack in your sink, then scrub away any food particles that are stuck on.

Step 2: Locate your filter

The filter is located at the bottom of the dishwasher and looks like a circular raised object. You can remove the filter by gently pulling up and twisting it. You may see arrows on your filter indicating which direction to point.

Step 3: Rinse the rims

Concentrate the water flow to the mesh. It may take some time for the mesh to loosen up because it is full of food particles or other grime. Fill a container up with warm soapy water, and soak the filter in there for 15 minutes if your filter is still dirty. After 15 minutes, remove the filter from the water to rinse off any remaining gunk.

Step 4: Clean Dishwasher Floor

Take a few minutes extra to clean your dishwasher’s floor now that you have removed the filter and bottom rack. Food and grime may get stuck and accumulate in the corners of your dishwasher, particularly near its opening or door.

It’s not too difficult to fix with a little elbow-grease. Scrub any stuck gunk with a sponge or brush dipped in soap. You don’t need to rinse it, as you’ll run the dishwasher’s ‘clean’ mode afterward.

Step 5: Restore Everything

To secure your filter, place it back into your dishwasher by twisting it in the opposite direction you removed it. The bottom rack can be rolled back into the dishwasher. Place a cleaning tablet in your dishwasher (or white vinegar in a bowl or mug) and let it run on the ‘cleaning’ cycle. This will give your dishwasher filter the final touch.

How to keep your dishwasher filter clean longer

You can keep your filter cleaner by removing any excess food from dishes before you put them in the dishwasher. Some sauce or crumbs are okay, but avoid putting in a plate that still contains a half serving of last night’s potatoes. It will prevent excess food from getting stuck in the filter.

What else can you do? Regularly clean out your dishwasher. You can use dishwasher cleaning tablets or run a hot-water cycle with a bowl of vinegar in the bottom rack.

Organizing

Three simple ways to show your home extra love

Valentine’s Day means showering your loved one with thoughtful presents and affirmation. It also means spending quality time together. This year I want to focus on another relationship that is important in my life: my relationship with my house.

It’s possible that you think, “That’s strange.” Your home is a non-living object. You’d be correct, but let me explain: our homes are a container for energy – both good and bad – in which we all play a role.

Here are 3 things you can to create a harmonious co-habitation space and be a better partner:

1. Take a Deep Clean Really Seriously

I’m talking about more than just dusting your ceiling fans or scrubbing the tile grout with a brush. We are usually focused on the things we can see. This is about what’s not visible. You should also be a custodian for good vibes.

Set your intentions using , the ancient practice of sage-smudging . You can “clear” the air and leave your home smelling fresh. Try your hand at Feng Shui. Take some time to learn the rules, and then take a good look at your surroundings. Is there a way you can create a better flow of energy?

It’s not a secret that certain objects have meaning and can make you feel a particular way. Give yourself permission to let go of something you have been holding onto, like a piece of furniture you got from an ex or a gift you received as a wedding present. These energy blockers prevent you from creating a home full of items that you love and reflect positive memories.


2. Embrace Quirks

There is no perfect partner. The sooner you accept this, the happier you will be. It’s the same for your house. Stop obsessing about annoying features. Celebrate the unique features of your space. This odd window that sits between the living room and kitchen, but feels outdated, might be just the place for your growing collection of plants. You can create a corner gallery in a small, awkwardly shaped space.

You can go one step further and write a letter of love to your house, expressing all that you are grateful for. It’s a great way to gain perspective. You may also get some fresh design ideas.


3. The little things are important

To keep a relationship from falling apart, it is important to maintain the relationship. Spend an afternoon giving your home some TLC. You can oil that door hinge that has been squeaking for months, hang that art piece that has been on the floor, or steam wrinkles from your curtains. Consider it more of a kindness to an old friend than a chore.

Cleaning

How to Maintain a Wax Warmer in 4 Simple Steps

Wax warmers add a cozy scent to your home without the open flame of a candle. Wax warmers can be a great way to experiment with new scents. Wax warmers do require some cleaning, which candles don’t.

Cleaning your wax warmer is not difficult and can be done quickly when necessary. Continue reading to find out how to clean your wax heater, what you will need and how to maintain it. In no time, you’ll be able to enjoy your favorite scents.

How often should wax warmers be cleaned?

When the wax in the warmers has run out, it should be cleaned. When the scented wax in your warmers stops smelling, you’ll know it has happened. You’ll also need to clean the wax warmers if there is a lot of dust in them from not using it for a while.

What you’ll need

It’s not necessary to use much cleaning solution to clean the wax warmer. What you will need is listed below.

  • Cotton balls
  • Paper Towels
  • Sponge
  • All-purpose cleaner
  • Cleaning cloths (preferably Microfiber)
  • Mineral Oil
  • Spoon
  • Freezer (optional)

Step 1: Prepare Your Wax Warmer

Gather your cleaning supplies and make sure your wax heater is turned off before you start. If your warmer is still on, it can cause a bigger mess and even burn you. Continue reading if the wax is still hot. If the wax has cooled and become hardened, move on to step 4.

Step 2: Remove Warm wax

Place a cotton ball, or a scrunched up paper towel in the warmer if the wax is still liquid and warm. This will absorb all the excess wax. It may take a few minutes for this to work. After the wax is absorbed, throw the cotton balls and paper towels into the garbage can. Never pour hot wax into a drain.

Step 3: Remove the Residue

You will still have some wax residue in your warmer. Grab a sponge, some all-purpose cleaner and scrub away the residue. Melamine sponges are great for tough stains.

Wipe any drips from the outside of the warmer with a dry cloth and a few drops mineral oil. Both areas can be dried with a microfiber towel.

Step 4: Remove Hardened Waxes

You have two options if your wax is past its prime but has hardened. The first option is quicker, but it takes more time. Option two is quicker, but requires a little more elbow grease. Place your wax warmer, which is fully cooled, in the freezer for 15 mins. This will make it easier but also slower. The cold air will shrink the wax and cause it to pull away from its sides. Take a spoon, and gently push the wax out from the sides of the warmer once it is removed from the freezer.

Turning your warmer on again is the second way to remove hardened wax! Turn it back on for a couple of minutes to warm up the sides and bottoms of the hardened wax. Then, using a spoon, gently scrape away the wax that has been slightly warmed.

If necessary, use the steps in step 3 to remove any remaining wax residue from both methods.

How to keep wax warmers clean longer

Consider two things if you want to reduce the frequency and save time of cleaning your wax warmer. High-quality waxes last longer and require less cleaning. Low-quality waxes are cheaper but they can be a bigger headache to clean.

Consider buying a reusable liner for your wax warmer. These liners, which are made of silicone, sit on the top of the wax warmer. They allow you to pop out the used wax. The liner may need cleaning occasionally, but this will be much less often than if you were to use a warmer that didn’t have one.

Organizing

When You Don’t Have a Linen Closet, Here Are 16 Linen Storage Ideas

We could all use more space for storage. This is especially true if you are living in a small apartment or house. It’s not easy to store linens if you don’t have a dedicated linen closet.

Try one of these 16 creative ideas instead of stuffing your clean linens into any corner of your overstuffed closet.


01 of 16

Double Duty Seating

You can keep your linens right where you need it, like in your bedroom. The bench can be used as a stylish seat and hidden storage.

You can use the space to store sheets and bath towels. You could also use this space to hide your throw pillows at night. Consider using your bench at the end of the bed as a window.

02 of 16

Baskets Are Your Friends

Baskets are a great way to organize your home. They are not only great organizational tools, but also add a boho or farm feel to any space. You can also roll up sheets in the bedroom and place them there.


03 of 16

Use a Hamper

Who said that hampers are only for dirty laundry. A wicker or cloth hamper is a great place to keep clean, folded towels in your bathroom. Make sure to let your guests know that it’s not meant for washing items.

04 of 16

Shelving can be used as an open closet

As long as you keep your things organized, using shelves for storage is a breeze. Towels can be neatly folded and placed on top or bottom of bookcases in the hallway, bathroom or bedroom. Baskets can be used as additional organization tools.


05 of 16

Label Everything

If you are short of storage space, you should make the most of what you do have. Add shelves to your empty walls or coat closets. Add labeled bins for easy organization.


06 of 16

Hiding Linens in Drawers

Roll up your towels to hide them in a drawer if you have extra space. Use a drawer separator to organize smaller items such as dish towels and washcloths.

You don’t want adjustable drawer dividers. Instead, cut a piece sturdy cardboard that fits snugly into your drawer.


07 of 16

Make sure you have space under the sink

The space beneath your sink in the kitchen or bathroom can provide the perfect storage solution. Use clear bins for small items and boxes or trays to stack and fold towels and washcloths neatly.


08 of 16

Show them off

You don’t have to hide your linens just because you put them away. You can store your sheets and towels on a shelf or under the sink if you fold them or roll them neatly.


09 of 16

Hide Linens Under Your Bed

You don’t want anyone to know what you have under your bed. So, hide everything under there. This space is often unused and hidden so there’s no clutter visible.

To keep sheets and towels dust-free, store them in fabric storage bags or slim bins under the bed. You can hide the bins underneath your bedframe with a bedskirt, large comforter, or duvet.


10 of 16

Dressers can be used in unexpected places

Dressers do not have to be in the bedroom. Use one as a table for your entryway or to store winter items. You can use the drawer space left over for linens. If you place one in your living room, it will serve as both a TV table and linen storage. You can do the same with a credenza, buffet or other furniture. That’s why doors and drawers are so useful.


11 of 16

Take Cabinetry to the Next Level

Create your own linen closet if you don’t already have one. You can hide clutter in a tall cabinet that has doors, but you can also neatly fold and stack towels and sheets. If you really want to make a difference, consider investing in shelf dividers that will help keep your items organized.


12 of 16

Use the backs of doors

Why not make the most of it? A rack that can be adjusted on the backside of a bathroom door will hold everything from towels to washcloths. Add a rack inside a closet to store folded sheets or pillowcases.


13 of 16

Roll towels tightly

Rolling is the best way to save space for packing and storing. Roll your towels tightly after folding them into a rectangular shape. You can then store your towels on a shelf or in a basket.


14 of 16

Hooks Save Space

Wall hooks are a great way to store towel. There are many options to suit your taste, from bold and bright knobs to simple wood pegs. You can use them to dry your towels after a shower.


15 of 16

Find Hidden Storage

If you plan well, many pieces of furniture will serve multiple purposes. You can use this bench for storage of shoes, but it could also be used as a bench in the hall or bedroom to store linens, workout equipment, or underwear.


16 of 16

Fold and Stack

Folding your linens is the key to keeping everything neat and tidy. The end result is well worth the extra time. You can make items such as towels and clothing stand on their own by using the KonMari Method. This will reduce their footprint in your home and their space. You can even display them in bins or open shelves.


Organizing

How to keep your home office organized in 14 simple ways

Home offices used to be pushed aside in favor of guest rooms, gyms, etc., but they are now a hot item.

You know that even if you have a dedicated office, spending much, much more time in it can easily transform a pile into a mountainous mess. If a document does not exist in “the cloud,” then it is more likely to end up in the garbage.

There are simple tricks that can help you organize your office on any budget. Browse through these 14 easy ways to organize a home office, whether you’re planning to stay at home indefinitely or simply want to update your occasionally workspace.


01 of 14

Make use of vintage filing cabinets

Most people are frightened by a filing cabinet that they have just purchased from an office supply store. These solid oak cabinets from the early 20th century with metal plates are a welcome exception. These cabinets are full of character and their semi-gloss finishes reflect light into darker rooms.

You can use vintage, larger filing units to organize everything from receipts and protractors to all kinds of paperwork.


02 of 14

Maximize small containers

Save yourself from future frustrations by purchasing multiple small organizers if the items that you want to organize are smaller. You’ll be able find your pen easily and quickly. can be stored in a rattan container on a shelf at the bottom.


03 of 14

Opt for Floor-to-Ceiling Cabinetry

You can create a dramatic and spacious room by tucking your desk into the cabinetry. Open shelving in the middle of this desk adds contrast and keeps important items close at hand.


04 of 14

Mount Long Floating Shelving

A side table, floating shelving and a desk made of the same material create a cohesive look perfect for small offices. This keeps your office from feeling cramped and prevents the shelves from appearing cluttered.


05 of 14

Hang Up Minimalist Shelves

You need to choose your organization carefully if your home office used to be a bedroom, and you plan to return it to that role in the future. Minimalistic shelving will keep clutter from your desk, and look great once you return the room to its original purpose.

You need as much space for your arms as possible. Choose a wall sconce that has an adjustable head. You will have light and space where you need them.


06 of 14

Use additional storage to your advantage

It’s easy to create a chest of drawers out of woven baskets that will keep your office looking bohemian, relaxed and organized. This piece can be easily repurposed for other rooms if needed.


07 of 14

Double it up

You and your partner both need to be able to work at home? You have children who need a place to complete their schoolwork. You can turn a hallway, or a side of the room, into an office space by installing a row of desks. Both of you can have their own drawers and know exactly who took your phone charger.


08 of 14

Take Care of the Clutter

It’s a clever trick to install horizontal shelves on the side of vertical units when installing cabinetry. The shiplap wall desk is easy to keep organized, and it looks great in any bedroom.


09 of 14

Desk Trays

You can use a desk table to add dimension to your workspace, as well as to add color, texture or shine. These are also perfect for organizing a desk that is freestanding without cabinets.


10 of 14

Install a Cork Wall

Want to see everything at a glance? Install a cork wall. You can use cork to create a wall. Hang up reminders, calendars, schedules and to-do list. You can DIY an entire wall with cork or buy one cork sheet to temporarily fix it.


11 of 14

Mix open and closed storage

You may feel as if you are in a closet when you have tall vertical cabinets on either side of you. Take off all (or some) of the doors from one side, and leave that side open. You may need to spend some time using your power tools but you will not succumb as quickly to the office boredom.


12 of 14

Eliminate Eyesores

Papers and snack wrappers that are crumpled need to be disposed of. Try a basket made of natural fibers instead of a flimsy plastic or metal bucket. If you want to dispose of dirty items, you can use a small plastic tub with a liner and place it in a larger basket.


13 of 14

Add a Console

When selecting additional pieces, consider the height of your cabinets. In this office, the console is at a lower level or aligned with the bottoms of the cabinets. This keeps the flow of the room and stops the console from becoming a focal piece.


14 of 14

Think Vertically

Binders will take up lots of space on your desk, no matter where or how you store them. Vertical magazine file organizers are a great way to organize tall packets of papers and manuals.